Sandcastle Barrier Beach
Demo layout with stronger fetch for advanced tide defense.
Overview
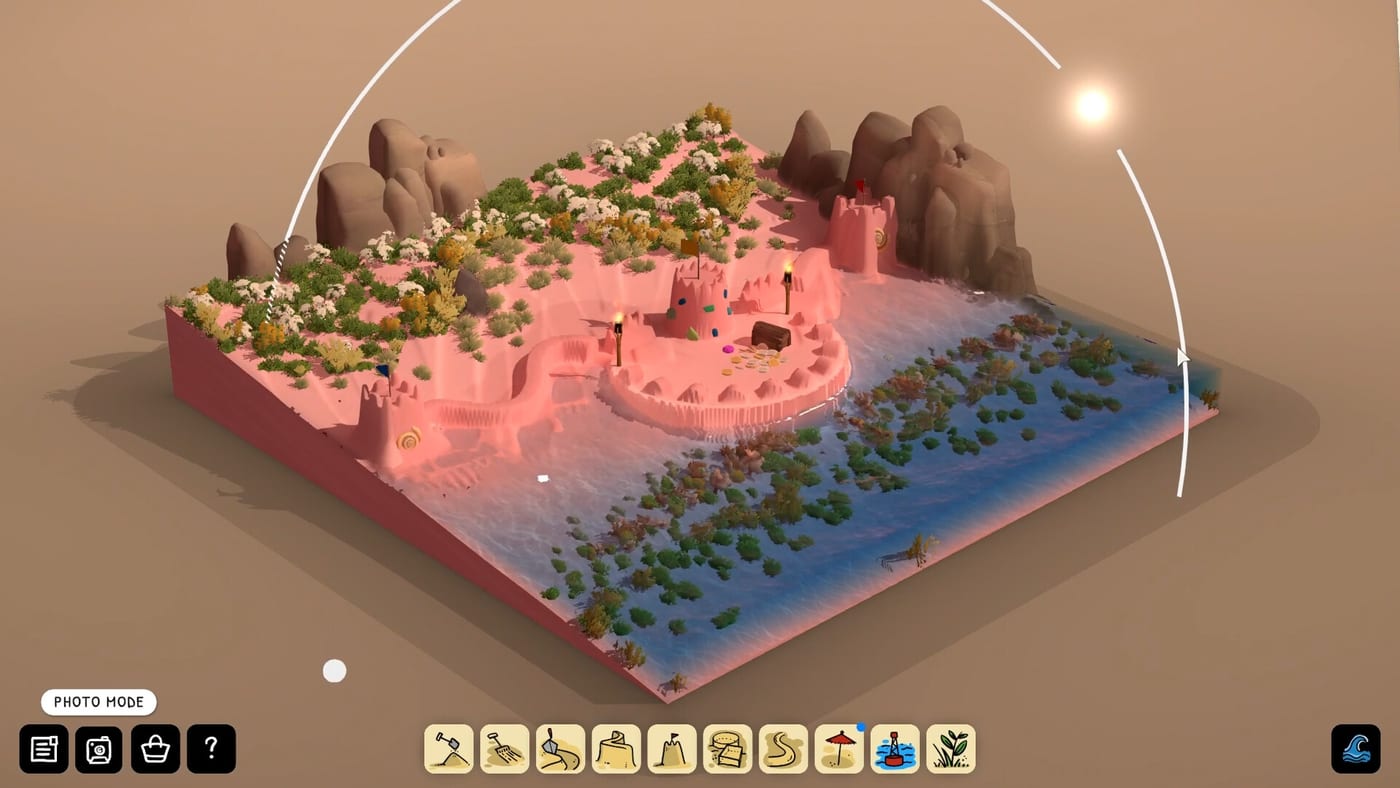
Barrier Beach is the second layout in the Sandcastle demo, paired with Base Beach. It simulates a sand barrier style shore with more open wave fetch hitting your face-on walls. The full game lists additional barrier-like and unrelated layouts TBA; this page covers the demo-playable Barrier map only.
Treat Barrier as the exam after Base tutorials—not because tides are unfair, but because flow channels punish shallow moats and thin crests faster.
Fetch and exposure
Barrier orientations emphasize direct surf impact compared to Base. Foam climbs higher on seaward curtains, and corner vortices strip sand when merlons are too dry. Read Protect From the Tide with Barrier in mind before importing Base moats unchanged.
Defense priorities
- Landward relocation of critical rooms when possible
- Seaward buttresses on every corner (Build Strong Walls)
- Wide spill moats instead of deep pits (Carve Moats)
- Checklist audits via Tide Defense Checklist
Moats on Barrier
Partial moats that bleed surge sideways often outperform symmetric rings that trap water against one face. Connect channels to downhill exits visible from camera height. If last tide pooled mid-ring, partial backfill beats deeper digging.
Tools and carving discipline
Use Digging Tools for berm mass, Carving Tools only after one successful tide. Decorative carving pre-test fails dramatically on Barrier screenshots.
Collectibles
Hunt lee pockets behind default berms during Find Collectibles laps. Shore Treasures still decorate stable platforms—not moat floors mid-surge.
Progression context
Starfish unlocks (Starfish Collectibles) may let you revisit Barrier with new sand types when the full game expands customization. Demo progress teaches skills transferable to Lagoon and Atoll layouts later.
Demo access
Barrier requires the demo installed from Demo Download. Compare roster limits in Demo vs Full Game.
Learning path
Master Base Beach → run checklist → Barrier build session → review damage with Tide Erosion notes.
Windward versus leeward faces
Identify windward faces by watching the first surge of a cycle. Double buttress windward corners; keep decoration on leeward platforms when possible.
Photography challenges
Spray and higher foam can obscure low-angle detail shots. Raise camera height or wait for mid-retreat calm between waves.
Practice export
Skills learned here translate to exterior rings of future Atoll Beach layouts when the full game adds them—exterior fetch resembles Barrier even if interiors calm down.
Barrier session agenda
Arrive with a written goal: survive two tides with one gate intact, or carve a spill moat that never pools mid-ring. Barrier sessions without goals turn into chaotic height races that collapse predictably. Use Tide Defense Checklist between goals.
Sound as fetch indicator
Louder surf usually correlates with stronger barrier fetch. When audio intensifies, pause Carving Tools and pack damp sand along the windward toe instead.
Weekly practice plan
Session A: windward buttress only. Session B: partial moat with measured spill width. Session C: full keep with Tide Defense Checklist. Spacing practice prevents Barrier frustration spikes that make players quit before understanding fetch.
Comparison screenshots
Take matching camera bookmarks on Base and Barrier with the same wall height. Side-by-side albums sell the learning curve to friends better than verbal warnings about wave energy.
Failure recovery mindset
Barrier collapses feel dramatic because fetch concentrates energy. Keep a wet sand pile staged landward for quick toe repairs instead of rebuilding entire towers from scratch after each cycle.
Closing preparation note
If Barrier frustrates you, return to Base Beach for one calm decoration session, then retry Barrier with a single design constraint like “one buttress only.” Constraints reduce overwhelm.
Final notes
Return to related hub pages when patches land—mechanics stay stable but tide timing or tool unlock order may shift in Steam news. Cross-link siblings in this category for moats, collectibles, and physics vocabulary. Pair reading with one in-game tide cycle so abstract advice becomes muscle memory on wet sand.
Frequently Asked Questions
Quick answers drawn from the same systems covered above.
Is Barrier Beach harder than Base?
Stronger fetch increases erosion pressure. Techniques differ; difficulty depends on moat and wall design.
Is Barrier the same as sand barrier marketing?
Store text mentions sand barrier layouts among ten full-game beaches. Demo Barrier is the playable slice today.
Should beginners skip Barrier?
Learn on Base first. Barrier is the natural second step, not day-one mandatory.
Do tides cycle faster on Barrier?
No documented faster cycle. Impact intensity differs, not necessarily clock speed.
Can I switch back to Base after Barrier?
Yes within demo customization unlocks. Use Base for photography if Barrier surf obscures details.